Like I said in my previous post I wanted to take a course in botanical illustration and finally I found one in England, United kingdom.
I justed signed up and I cannot wait to receive the lessons to start.
Although I have some experience I do not have much experience in botanical drawing and painting so I have to learn a lot. I asked advise which course was best for me: nr I or nr II. The advice given was, because I already had some experience in drawing and painting, to start with nr II. So I did.
I keep you informed about the course and my work and the progress thet I hopefully will make.

Saturday 30 October 2010
Wednesday 20 October 2010
botanical painting
I love botanical painting, I always did. But I feel it is so difficult. I bought some DVD's of very famous painters and my most favorite DVD is of Billy Showell. I bought also a lot of books about drawing and painting in a lot of different techniques and subjects. I searched the internet for botanical painting and painters and also for an online course. I found a course, but it costs so much money, too much for me. But then I discovered that one of their students (a professional artist now) put her journey while following the course in a book. It became a beautiful book and also because she shows and tells
Friday 15 October 2010
botanical painting
I love botanical painting, I always did. But I feel it is so difficult. I bought some DVD of very famous painters and my most favorite DVD is of Billy Showell.
I bought also a lot of books about drawing and painting in a lot of different techniques and subjects and of course also books about painting flowers.
I searched the internet for botanical painting and painters and also for an online course.
I found a great course with The Society of Botanical Artists, but it costs so much money, too much for me.
But then I discovered that one of their students (a professional artist now) put her journey, while following the course, in a book. It is called Botanical sketchbook by Mary Ann Scott
Here you can read more about the book, the author and the SBA
http://makingamarkreviews.blogspot.com/2010/04/book-review-botanical-sketchbook.html
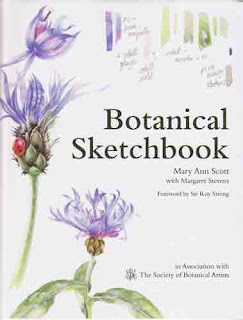
It became a beautiful book, also because she shows and tells all about the excercises and assignments.
Following the book you can follow the course yourself and I intend to do so.
That's why I started an excercise in drawing pears to start with.
I found another book that concentrate even more on the basics of drawing and painting botanical illustrations.
"Botanical Illustration course with the Eden project" by Rosie Martin and Meriel Thurstan.
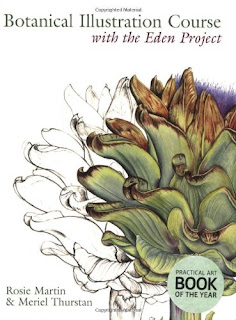
I am so happy with these books. And it will take many many months to make all these excercises.
But I feel that when I have done so I will be able to draw and paint better.
some excercises drawing pears

At the moment it is fall in Holland so a lot of pears are available.
I wanted to explore the form and different light sources and tones and methods to create the rounded form of the pears.
Not an easy subject I discovered.
But I like to start drawing and painting flowers and fruits so I feel that I have to start at the beginning and do a lot of excercises before I will choose an more complex subject.

Saturday 2 October 2010
selfmade greyscale finder
Today I have made a greyscale finder.
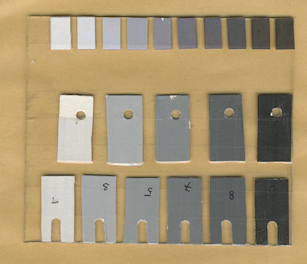
Because of the transparancy of the sheet I can find the right value far better.
I put a colored piece of paper underneath it so you can see the transparancy of the greyscale finder better.
Not only I can use the gaps or holes in the grey pieces of paper but I can also look at the spaces between the greys and be able to compare them very quick.
I used doubleside tape to attached the pieces of paper to the plastic sheet and put clear tape over them to protect the paper.
I wanted to have 5 or 6 greys to use for the earlier stages of drawing and painting.
The row in the middle has a small hole in them and the other row is at one side and has larger holes.
And for the final stages of my painting I like to see more tones so I added a third row of 10 values at the other end of the plastic piece.
I know, these greyscales are not expensive, but here in Holland I could not find them and I love to make my own things. While making the pieces of grey and the grey scale I had a lot of fun
 and of course I learned something from it, like always
Subscribe to:
Posts (Atom)
